


Bouldering has one of the lowest gear barriers of any sport. You don't need ropes, a harness, a partner, or expensive equipment to start. On your first session, all you need is a pair of rental shoes and a day pass. But as you climb more regularly, having your own gear makes a real difference — both to performance and to how much you enjoy the sessions.
This article covers exactly what you need, what's optional, and how to build up your kit without wasting money on things that don't matter yet.
Climbing Shoes

Climbing shoes are the single most important piece of gear in bouldering. Everything else is supplementary. A well-fitted shoe transfers force from your foot to the hold precisely, allows you to stand on small edges, and gives you feedback about where your foot is on the wall. A poorly fitted shoe — or a rental shoe that's too large — slips on footholds and gives you almost no information about foot placement.
For your first few sessions, rental shoes are fine. Most gyms in Singapore offer rental shoes included in the day pass or for a small fee. They're entry-level shoes that get the job done for a beginner who isn't sure yet whether climbing will stick.
Once you're climbing two or three times a week, buy your own shoes. The reasons are practical as much as performance-related: rental shoes are worn by many people, and hygiene in a humid gym environment is a genuine concern. Your own shoes will also fit better — you can take the time to find the right size and shape for your foot rather than grabbing whatever rental size is close.
For beginners, a flat or mildly downturned shoe in a neutral last is the right starting point. Aggressive downturned shoes are designed for overhanging climbing and are uncomfortable to wear for the long sessions beginners typically do. A comfortable, well-fitted flat shoe teaches better footwork because you can actually feel the hold beneath your foot. Fit should be snug — toes close to the end of the shoe — but not painful. If your toes are curled involuntarily, the shoe is too small.
Chalk

Chalk absorbs moisture from your skin and improves friction between your fingers and the holds. In Singapore's humidity, sweat is a constant factor — even on easy problems, hands get damp quickly and grip degrades without chalk. It matters more here than in cooler, drier climbing environments.
For a beginner, a small bag of powder chalk is the right starting point. It's simple to use, effective, and inexpensive. Apply a light coating to your palms and fingers before each attempt and re-apply when hands feel damp. Avoid over-chalking — excess chalk mixes with sweat to form a paste that reduces friction rather than improving it.
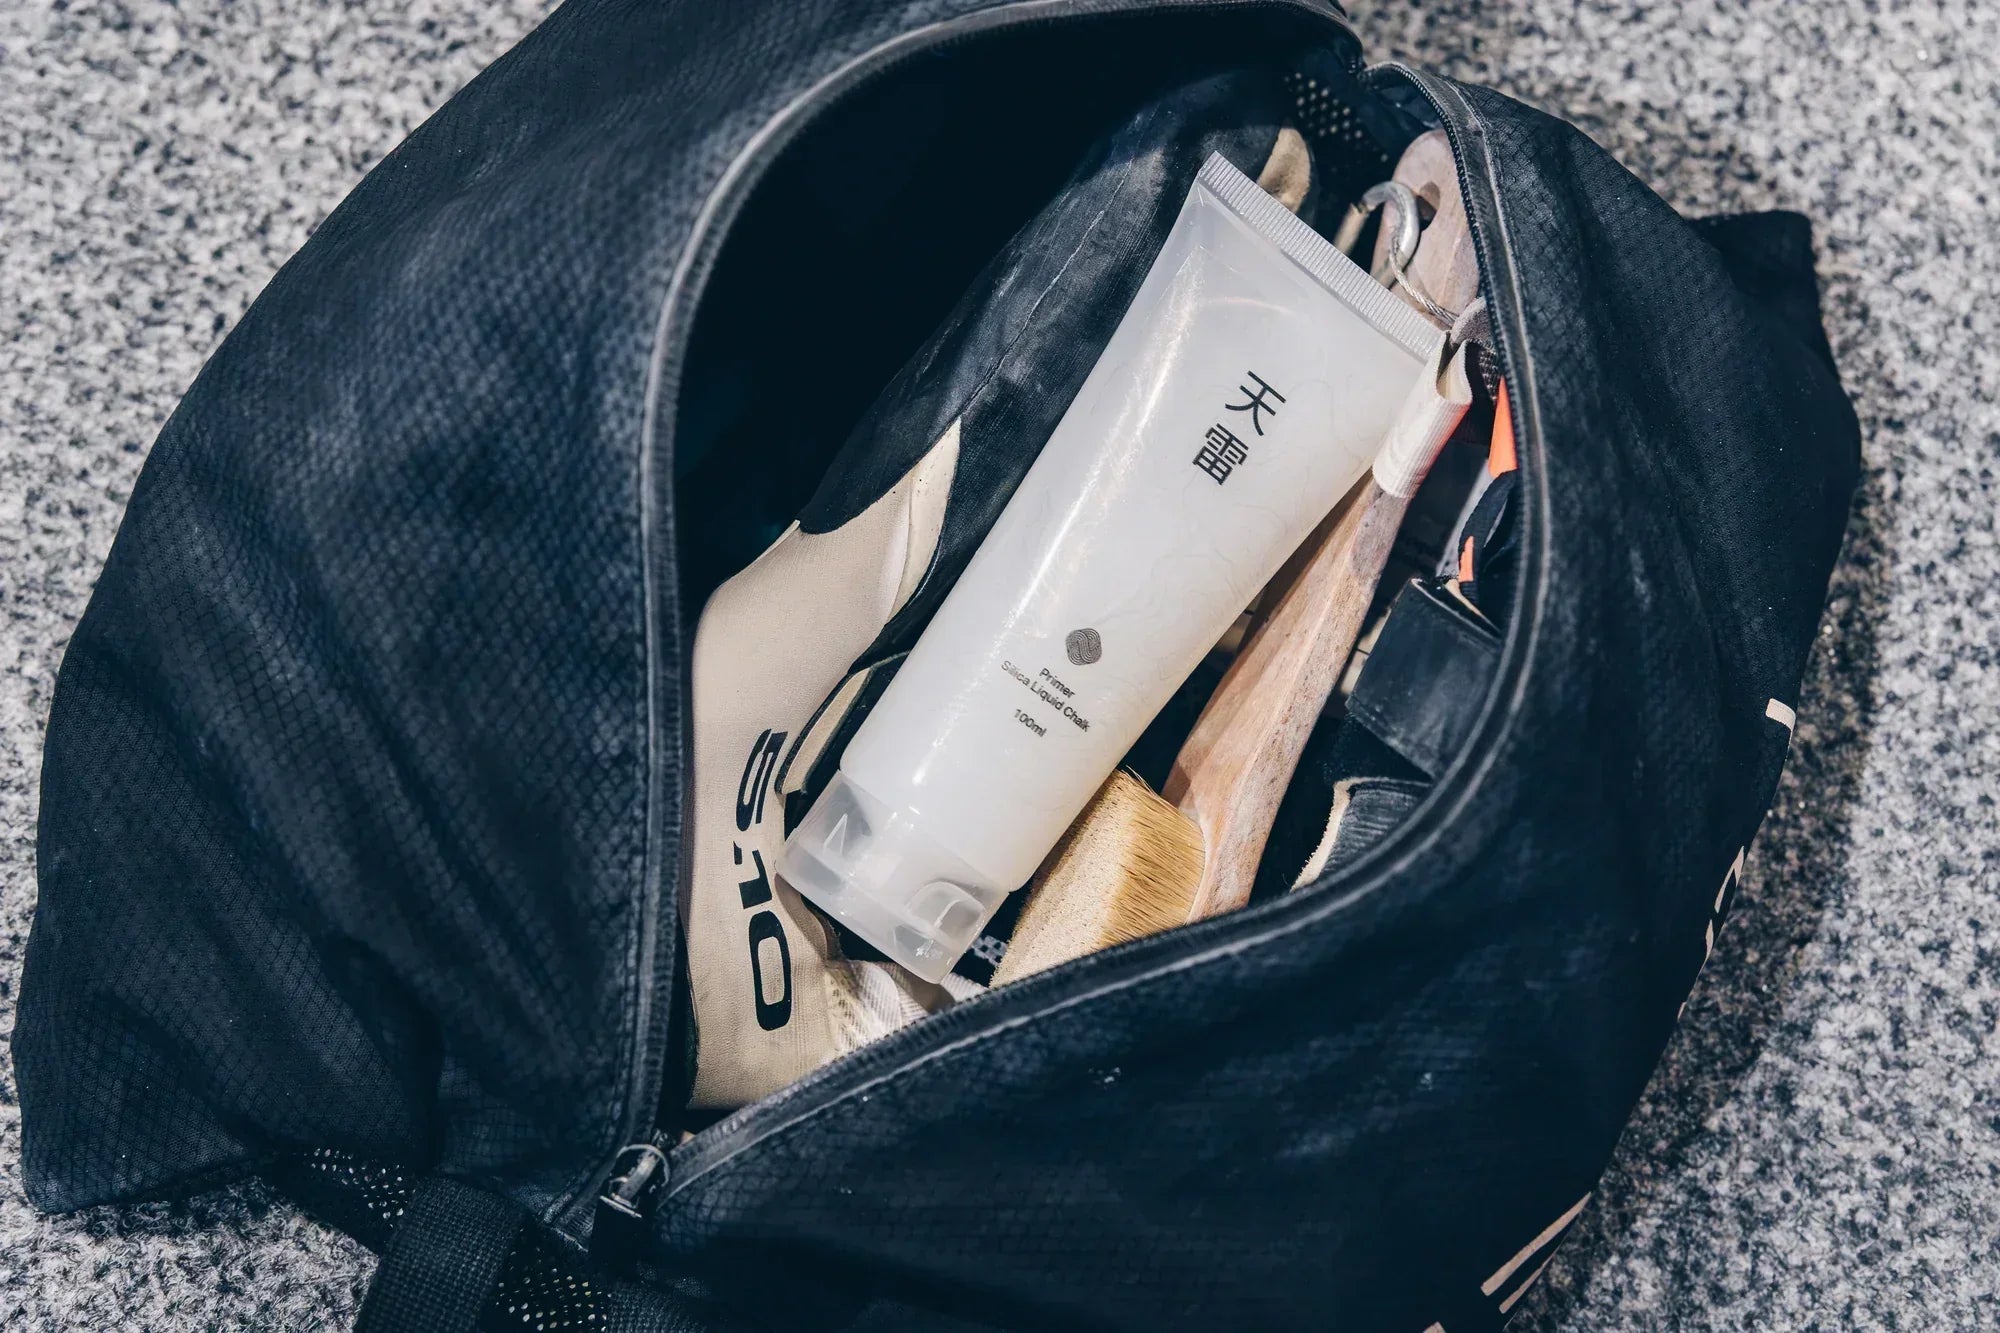
As you climb more regularly and start working harder problems with longer attempts, liquid chalk becomes useful. Thunder silica liquid chalk works well as a base layer in humid conditions — apply before your first attempt, let it set fully, then use powder on top for top-ups. For a full breakdown of how chalk works and how to use it, see the complete guide to climbing chalk.
Kumo powder chalk comes in fine and mix variants — the fine variant is a good starting point for beginners, spreading evenly and absorbing moisture quickly.
Chalk Bag
A chalk bag holds your powder chalk during a session. For bouldering, you have two options: a waist bag worn clipped around your hips while climbing, or a bucket bag left on the mat that you dip into between attempts.
Waist bags are more convenient for moving around the gym — chalk is always with you, and you don't need to walk back to your bag between attempts. Bucket bags hold more chalk and are easier to dip into quickly, but you leave them on the mat and walk to them between goes.
Either works for a beginner. Most people start with a waist bag since it's how chalk bags are most commonly sold. Look for one with a stiff rim — it keeps the bag open for easy dipping — and a secure closure to prevent chalk spilling in your gym bag. The chalk bag design matters less than fit and closure quality.
Skin Care
Skin care is gear that most beginners don't think about until their skin forces the issue. The friction from holds wears skin faster than most new climbers expect, and in Singapore's humidity the problem is amplified — skin is softer and more vulnerable to tearing than in dry conditions.
A skin file is the most useful single tool for maintaining climbing skin. After every session, check each fingertip for rough or raised callus edges and file them smooth before they snag on a hold and tear. The Razure skin file is compact enough to keep in a chalk bag and fine enough for regular maintenance use without over-removing skin.
A basic post-session routine — wash hands to remove chalk residue, file any rough edges, apply a light moisturiser before sleep — makes a significant difference to how quickly skin adapts to climbing and how often you're sidelined by tears and splits. For a full guide to managing climbing skin in Singapore's climate, see the complete guide to climbing skin care in humid conditions.
What You Don't Need
Several products get marketed at beginner climbers that add cost without adding value at this stage.
Fingerboard or hangboard: finger strength training tools for intermediate and advanced climbers. Beginners have far more to gain from climbing volume than from isolated finger training, and loading tendons that haven't adapted to climbing yet is a reliable way to get injured. Leave this until you've been climbing consistently for at least a year.
Knee pads: useful for very specific knee bar moves that beginners won't encounter on easy problems. Not necessary at the start.
Compression sleeves and tape: tape has legitimate uses for protecting damaged skin mid-session, but buying it speculatively before you've had any skin issues is premature. A skin file and basic post-session care prevents most of the problems tape gets used to work around.
Premium chalk bags: chalk bag design doesn't meaningfully affect performance. A well-made basic bag lasts years. The novelty chalk bags you see in gyms are fun but entirely optional — function first.
Gear Progression: What to Buy and When
Before your first session: nothing. Rent shoes, use the gym's chalk if available, and see if climbing is for you first.
After 3–5 sessions: buy your own shoes if you're going regularly. This is the highest-impact purchase. Add a small bag of powder chalk and a chalk bag at the same time.
After 1–2 months of regular climbing: add a skin file to your kit. By this point your skin is taking regular wear and callus management becomes relevant. A light moisturiser for post-session use rounds out a basic skin care routine.
Once you're climbing 3+ times a week: liquid chalk becomes worth it. At higher session frequency in Singapore's humidity, a stable base layer makes a noticeable difference to grip consistency across a session.
Key Takeaways
- Rental shoes are fine for your first few sessions — buy your own once you're climbing regularly
- For beginners, a flat or mildly downturned shoe in a comfortable fit outperforms an aggressive shoe
- Powder chalk is the right starting point; add liquid chalk as session frequency increases
- A basic chalk bag with a stiff rim and secure closure is all you need — design is secondary
- A skin file is underrated beginner gear — add it after your first month of regular climbing
- Fingerboards, knee pads, and tape are not beginner purchases — wait until the sport gives you a specific reason to need them


Share:
Bouldering Grades Explained: How the Rating System Works